Shading Veneers
'Sand Shading' has been used for centuries to enhance marquetry.
Quentin Smith reviews the traditional method and looks at some more modern techniques.

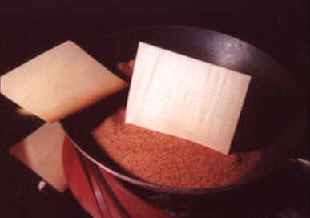
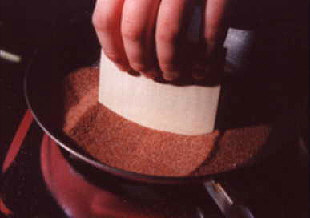
The 'traditional' method for darkening veneers is to plunge them into heated sand. That is the easy part - the more difficult bit is to retrieve them before they are scorched beyond recognition! As the sand will rarely be at a consistent temperature, and will have a temperature gradient through it in any case, a good degree of 'try it and see' is involved. One cardinal rule - you can always put the piece in again to darken it some more, but you cannot lighten it!
This works fine for the edge of veneers, but for darkening an area in the centre a different technique is needed. Spoon the hot sand onto the area, wait a few seconds then tip the sand back into the pan. Repeat until the desired shade is achieved. If the piece of veneer is small enough to be turned over easily shading from both sides can be advantageous.

Curved edges can be shaded by dragging the curve through the sand to produce a contour, then inserting the edge into the shaped sand. The sand at the bottom of the trough will be hotter and darkening will happen most quickly in this area.
For small pieces it may be easier to 'roll' the piece gently to achieve an even effect.

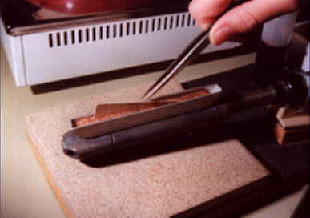
I have an old soldering iron which I often use for smaller work. I have added a small trough made from some aluminium 'U' section and I fill this with sand. Luckily the iron had a threaded hole through it and I was able to find a small bolt which fitted the thread to attach the trough.
In addition to being smaller and giving off far less stray heat the temperature is reasonably constant. Also I can also touch the edge of the veneer directly onto the iron to achieve a thin dark line. The edge must always be fully perpendicular to the iron so that the shading/scorching is even right through the veneer - otherwise the degree of shading will change when the picture is scraped or sanded. Avoid moving the veneer flat across the iron as this will tend to 'draw' scorch marks on the veneer - a bit like upside-down pyrography - and again any effect achieved is unlikely to survive the finshing process.

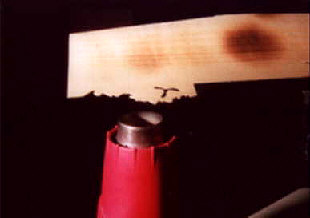
Hot air can be use effectively to scorch veneers. Here a piece of veneer is held over the nozzle of a paint stripping gun. Keep the veneer moving to avoid uneven scorching as the air flow tends to have 'hot-spots'. Watch the top of the veneer closely and remove it as soon as the desired shade is approached, because it will be slightly darker underneath.
One word of warning - all heat-shading causes the veneer to lose moisture and it may, as a result, change shape. This can be very frustrating when you have spent a good while carefully cutting an intricate shape.
Placing the shaded piece between layers of slightly moist tissue can assist the rehydration, but carries no guarantee that the original shape will be retained. The ideal, therefore, is to shade the veneer before cutting the final shape. This can be tricky, but involves marking through the shape of the 'window' in the normal way, but then cutting the insert piece about 2mm oversize. This piece can be shaded as required and allowed to rehydrate before being replaced behind the 'window' and cut to its final size.
A useful technique can be to shade a few areas of a veneer sheet in advance of cutting. Once the veneer has stabilised it can be cut as normal, using the shaded areas to best effect just as if they were natural variations.

